 Node.js
How to Create a Link Preview: The Definite Guide [Implementation and Demo Included]
When you add a link in chat message or share it on social networks such as Facebook, Twitter, LinkedIn, you can see a small visual preview and brief description of the link. The main benefit of link previews is that users have some expectations of what they’re going to get before they open the link.
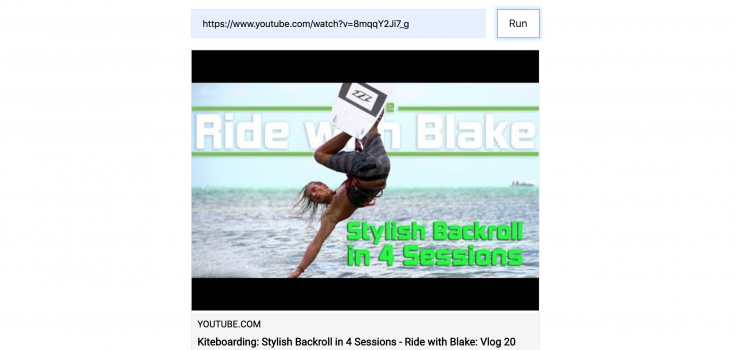
In this blog post, we will build a solution, which turns a link:
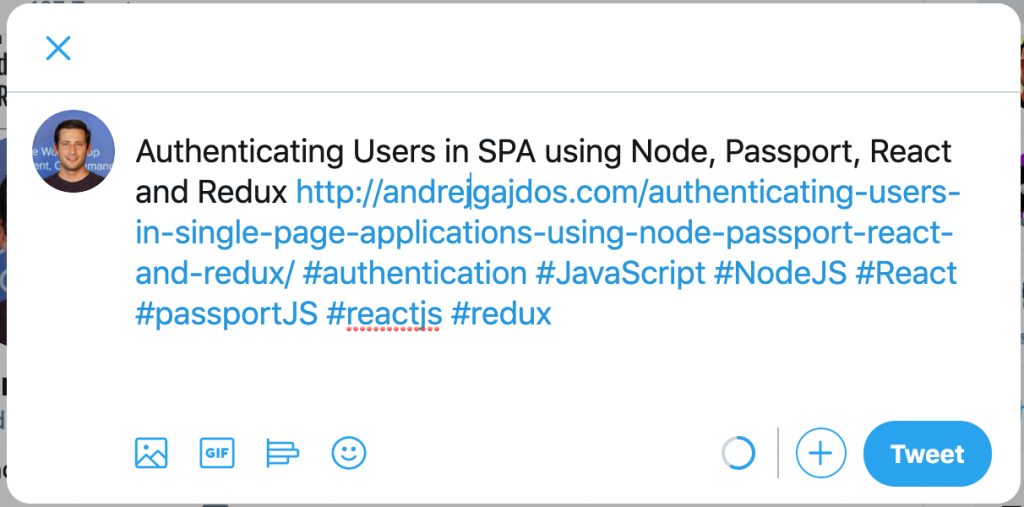
Into this:

I released this solution as npm packaged. You can check the source code on Github and deployed demo on Heroku.
Nowadays, we can see link preview feature in almost every social network or chat application, where users can send or share url links. In this blog post, I want to share with you, how to create a link preview feature without third-party APIs. I am going to describe the whole strategy of creating link previews, including implementation using open-source libraries in node.js.
Why I decided to write this blog post?
When I needed to create preview link feature, I found a lot of misleading or outdated information on this topic. If I found a solution which worked, it relied on some paid third-party APIs. Hope, this article will save you a lot of time figuring out how to build this feature with open-source libraries in any back-end language.
What should be included in a link preview?
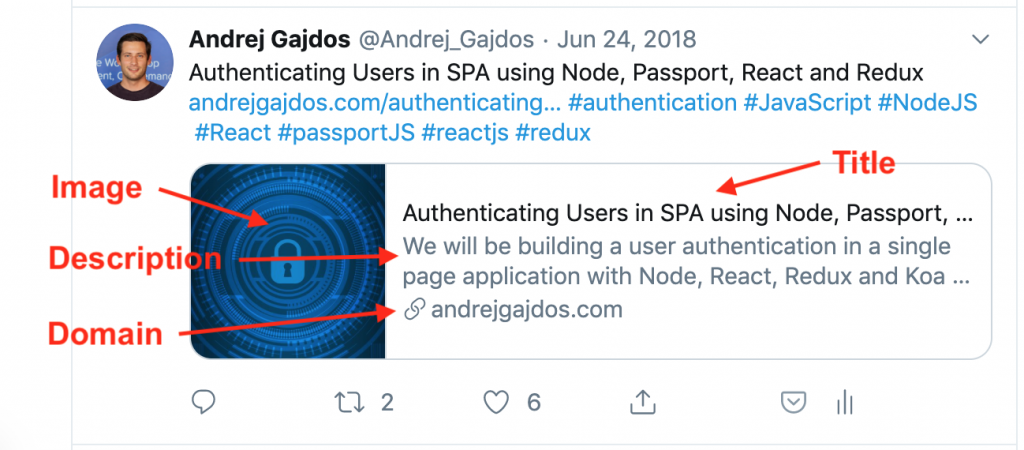
A preview of url link usually contains the title, a description, the domain name and an image. You can create link previews even more rich by providing other information. For more details check Bonus Tips.
How to get data for a link preview?
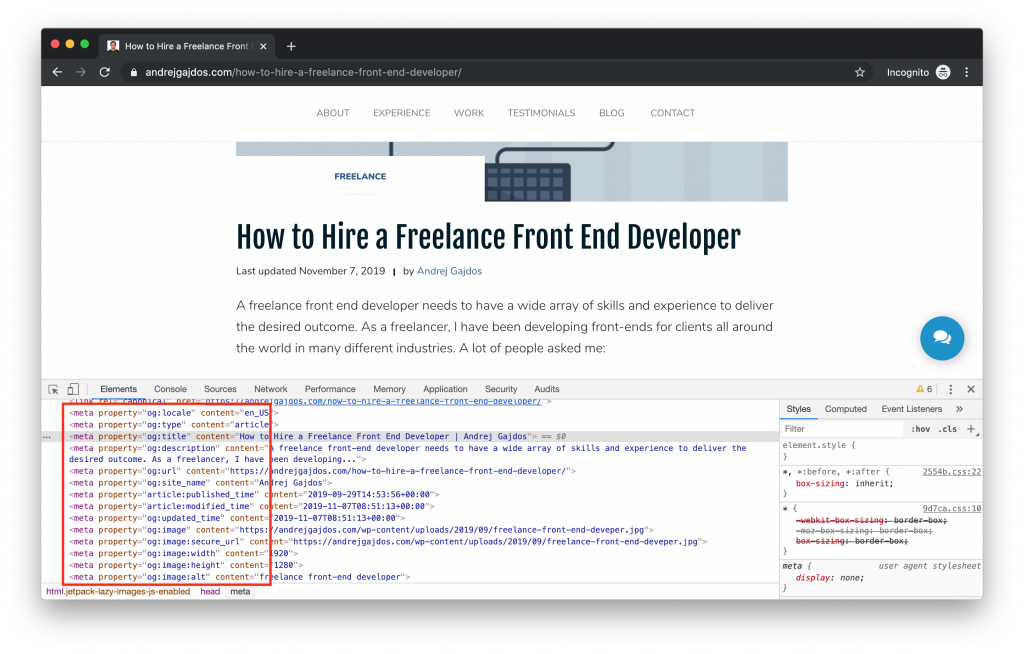
Facebook launched Open Graph protocol in 2010, which is now managed by the Open Web Foundation. The main purpose is easier integration between Facebook and other websites. With that being said, Open Graph Protocol allows to control what information is used when a website is shared. If websites want to use Open Graph Protocol, they need to have Open Graph meta tags in the <head> part of the website’s code.
Other social networks take into account Open Graph Protocol as well. However, Twitter created own tags for Twitter Cards, which are called Twitter card tags. They are based on the same conventions as the Open Graph protocol. When the Twitter card processor looks for tags on a page, it first checks for the Twitter-specific property, and if not present, falls back to the supported Open Graph property. You can find more information on Twitter documentation.

The following Open Graph tags are used for creating link previews:
Open Graph TitleThis tag works the same as the meta <title> tag. It allows you to define content’s title. If Facebook doesn’t find the og:title tag, it uses the meta <title> instead. This tag is very important, because <title> is usually shown in bold.
There is no limit on number of characters, but the title should be between 60-90 characters as meta title. Otherwise, it can be shortened or truncated. For example Facebook will truncate it to 88 characters.
Open Graph DescriptionThis tag is again similar to meta tag description. This is where you describe website’s content. Similar rules applies to this tag as for title tag. If a social network robot cannot find og:description tag, it uses meta description and there is no limit on numbers of characters. In this case, you should use around 200 letters.
An image is probably the most eye-catching element in link preview. You can define image with og:image title. Recommended resolution is 1200 pixels x 627 pixels (1.91/1 ratio) and image size shouldn’t exceed 5MB.
This tag defines the canonical URL for your page. URL provided is not shown on Facebook newsfeed, only domain is visible.
A complete list of og tags available can be found on the Open Graph website.
How to get data without meta and og tags?
There are a lot of websites without basic meta tags and og tags. What data should we preview in this case?
We can use data in document’s body.
The TitleIf website doesn’t contain meta title tag or og:title tag, we can consider a heading in document’s body as main title. The most important heading in body document is <h1>. If website doesn’t contain <h1> tag, we can look for <h2> tags.
The strategy for getting website description is similar as getting the title. If document doesn’t contain meta description or og:description, we can consider the main text of the document as the website description.
We will look for <link rel="canonical"> or og:url. If document doesn’t contain one of these, we will use the url parameter.
From all of the mentioned attributes, image is the most tricky element.
What image should represent website url, if html document doesn’t containog:image tag?
There is another way how to specify website image. There is link tag with attribute rel=”image_src” in the following format:
<link rel="image_src" href="image url" />
However, we can find a lot of websites without og:image or <link rel="image_src"> tag. In this case, we need to parse images from document’s body.
Raymond Camden described in his blog post from 2011 how Facebook and Google+ used to determine what image should be used for link preview. Facebook used og:image and <link rel="image_src"> tags and Google+ used first <img> tag in html body. None of these strategies seem right, because Facebook didn’t consider images in document’s body and Google+ chose the first image, which could be an image for layout.
Slack published a blog post, how they create link previews, but they don’t consider images in html body.
How does Facebook determine which images to show as thumbnails when posting a link?
The candidate images are filtered by javascript that removes all images less than 50 pixels in height or width and all images with a ratio of longest dimension to shortest dimension greater than 3:1. The filtered images are then sorted by area and users are given a selection if multiple images exist.
By removing the ability to customize link metadata (i.e. headline, description, image) from all link sharing entry points on Facebook, we are eliminating a channel that has been abused to post false news.
I think described strategy works well. Images less than 50 pixels in height or width are perhaps icons, images with the aspect ratio greater than 3:1 don’t fit in previews well. Images with greater area are perhaps more important for the website content than smaller images.
Implementation
You can find several attempts for creating a library which implements link preview feature.
There is a node.js “solution” on AWS Lambda. Unfortunately, the main library and it’s repository of the source code are not available anymore.
Is there open-source code for making ‘link preview’ text and icons, like in facebook?
I didn’t find any open-source implementation, so let’s build one.
Used libraries
If you want to implement the whole strategy for creating link previews, you need to use a library, which allows you to access DOM structure of html document. In node.js environment, I found three libraries, which allow accessing DOM:
- JSDom simulates a web browser environment in node.js and allows you to access DOM structure
- Puppeteer enables you to control headless Chrome from Node.js
- PhantomJS a headless web browser scriptable with JavaScript
JSDom doesn’t work well, because we need to get visible elements from the url and JSDom doesn’t parse css styles well [1, 2].
If you need to choose between Puppeteer and PhantomJS, I would recommend using Puppeteer, because PhantomJS development stopped and Puppeteer is faster and less memory intensive.
Configuring Puppeteer for Web Scraping
Puppeteer has a lot of options and it allows you to configure Chrome with various settings. Thus, using Puppeteer for the first time is not so straightforward. Before you open websites in Puppeteer, you should configure it to scrape data from websites.
Some websites don’t want you to scrape data. In this case, you can use puppeteer-extra-plugin-stealth, which uses various techniques to make detection of headless puppeteer harder.
If you want to interact with the website in Puppeteer, you need to use page.evaluate() function, where Puppeteer runs the script in the browser not in node.js. If you have some other modules or functions, which you want to use in evaluate function, you need to use page.exposeFunction(). Imported modules in node.js are not accessible in Puppeteer browser and exposeFunction allows you to expose functions into the browser.
When browser makes a request to a website, it sends a HTTP Header called “User Agent”. The User Agent contains information about web browser. Some websites don’t provide meta tags for common user agents. In Puppeteer, you can set up Facebook crawler user agent, because in most cases websites want to provide meta data for Facebook.
Strategy for getting individual elements for link preview
We are going to implement the following strategy in node.js, which should be applicable in every back-end language.
The TitleFind og:title in document’s header. If og:title doesn’t exists, find meta title tag in document’s header. If meta title doesn’t exist, find <h1> tag in document’s body. If <h1> doesn’t exist, find the first occurrence of <h2> tag in document body.
const getTitle = async page => {
  const title = await page.evaluate(() => {
    const ogTitle = document.querySelector('meta[property="og:title"]');
    if (ogTitle != null && ogTitle.content.length > 0) {
      return ogTitle.content;
    }
    const twitterTitle = document.querySelector('meta[name="twitter:title"]');
    if (twitterTitle != null && twitterTitle.content.length > 0) {
      return twitterTitle.content;
    }
    const docTitle = document.title;
    if (docTitle != null && docTitle.length > 0) {
      return docTitle;
    }
    const h1 = document.querySelector("h1").innerHTML;
    if (h1 != null && h1.length > 0) {
      return h1;
    }
    const h2 = document.querySelector("h1").innerHTML;
    if (h2 != null && h2.length > 0) {
      return h2;
    }
    return null;
  });
  return title;
};
Source: github.com
The descriptionFind og:description in document’s header. If og:description doesn’t exists, find meta description tag in document’s header. If meta description tag doesn’t exist, parse the text of the document body. Find first visible paragraph, which text is site description.
const getDescription = async page => {
  const description = await page.evaluate(() => {
    const ogDescription = document.querySelector(
      'meta[property="og:description"]'
    );
    if (ogDescription != null && ogDescription.content.length > 0) {
      return ogDescription.content;
    }
    const twitterDescription = document.querySelector(
      'meta[name="twitter:description"]'
    );
    if (twitterDescription != null && twitterDescription.content.length > 0) {
      return twitterDescription.content;
    }
    const metaDescription = document.querySelector('meta[name="description"]');
    if (metaDescription != null && metaDescription.content.length > 0) {
      return metaDescription.content;
    }
    paragraphs = document.querySelectorAll("p");
    let fstVisibleParagraph = null;
    for (let i = 0; i < paragraphs.length; i++) {
      if (
        // if object is visible in dom
        paragraphs[i].offsetParent !== null &&
        !paragraphs[i].childElementCount != 0
      ) {
        fstVisibleParagraph = paragraphs[i].textContent;
        break;
      }
    }
    return fstVisibleParagraph;
  });
  return description;
};
Source: github.com
The domain nameFind <link rel="canonical"> or og:url. If document doesn't contain one of these, use the url parameter.
const getDomainName = async (page, uri) => {
  const domainName = await page.evaluate(() => {
    const canonicalLink = document.querySelector("link[rel=canonical]");
    if (canonicalLink != null && canonicalLink.href.length > 0) {
      return canonicalLink.href;
    }
    const ogUrlMeta = document.querySelector('meta[property="og:url"]');
    if (ogUrlMeta != null && ogUrlMeta.content.length > 0) {
      return ogUrlMeta.content;
    }
    return null;
  });
  return domainName != null
    ? new URL(domainName).hostname.replace("www.", "")
    : new URL(uri).hostname.replace("www.", "");
};
Source: github.com
The ImageFind og:image in document header. If og:image doesn’t exists, find <link rel="image_src"> tag in header. If <link rel="image_src"> tag doesn’t exist, find all images in document body. Remove all images less than 50 pixels in height or width and all images with a ratio of longest dimension to shortest dimension greater than 3:1. Return image with the greatest area.
const util = require("util");
const request = util.promisify(require("request"));
const getUrls = require("get-urls");

const urlImageIsAccessible = async url => {
  const correctedUrls = getUrls(url);
  if (correctedUrls.size !== 0) {
    const urlResponse = await request(correctedUrls.values().next().value);
    const contentType = urlResponse.headers["content-type"];
    return new RegExp("image/*").test(contentType);
  }
};

const getImg = async (page, uri) => {
  const img = await page.evaluate(async () => {
    const ogImg = document.querySelector('meta[property="og:image"]');
    if (
      ogImg != null &&
      ogImg.content.length > 0 &&
      (await urlImageIsAccessible(ogImg.content))
    ) {
      return ogImg.content;
    }
    const imgRelLink = document.querySelector('link[rel="image_src"]');
    if (
      imgRelLink != null &&
      imgRelLink.href.length > 0 &&
      (await urlImageIsAccessible(imgRelLink.href))
    ) {
      return imgRelLink.href;
    }
    const twitterImg = document.querySelector('meta[name="twitter:image"]');
    if (
      twitterImg != null &&
      twitterImg.content.length > 0 &&
      (await urlImageIsAccessible(twitterImg.content))
    ) {
      return twitterImg.content;
    }

    let imgs = Array.from(document.getElementsByTagName("img"));
    if (imgs.length > 0) {
      imgs = imgs.filter(img => {
        let addImg = true;
        if (img.naturalWidth > img.naturalHeight) {
          if (img.naturalWidth / img.naturalHeight > 3) {
            addImg = false;
          }
        } else {
          if (img.naturalHeight / img.naturalWidth > 3) {
            addImg = false;
          }
        }
        if (img.naturalHeight <= 50 || img.naturalWidth <= 50) {
          addImg = false;
        }
        return addImg;
      });
      imgs.forEach(img =>
        img.src.indexOf("//") === -1
          ? (img.src = `${new URL(uri).origin}/${src}`)
          : img.src
      );
      return imgs[0].src;
    }
    return null;
  });
  return img;
};
Source: github.com
Testing
If you want to test your link preview implementation, you can use Facebook’s Sharing Debugger. This is a free tool, which scrapes any web page hosted on a public server and display how it would look when shared.
In addition to this, AI testing can help analyze how different elements of the page perform across various platforms, ensuring that your link previews appear consistently and as intended. By leveraging AI testing alongside traditional methods, you can gain deeper insights into user interactions and optimize your content for a more effective social sharing experience.
Bonus Tips
Enhance your link previews with richer content and greater user engagement through intelligent video editing. By utilizing tags like og:video, you can seamlessly replace static images with dynamic video previews, offering users a more immersive and informative experience. There are other information, which you can use in previews. You can use specific tags for articles, books or profiles.
Consider setting proxy or using IP rotation for your server, because some websites try to detect web scraping and block you. Some websites block users from specific countries. If you need to check more tips for avoiding web scraping detection, you can check this article.
Conclusion
In this article, we described how social networks and chat applications create link previews. Then we described implementation, which can be used in any back-end language. As an example, we implemented whole solution in node.js. The result is open-source node.js library and demo is deployed on Heroku.
As you can see, creating link preview feature is easy if you use the correct approach. You don’t need to rely on third-party API's and pay for similar services.